Organize rotations, blocks, or academic years: Building your own course makes it easy to assign specific cases and Integrated Illness Scripts to students, track class or cohort progress at a glance, and include course-specific information or directions for students.
Align Courses to Your Curriculum: Pick and choose content to create courses that fit your curriculum. You can create courses that align to longitudinal integrated clerkships, bootcamps, electives, or specific student's remediation needs. You can integrate cases from across your subscription to enrich an existing course. If you have access to Integrated Illness Scripts, you can create a course with select scripts for students to compare and contrast using one of our ready-made Integrated Learning Sessions, or combine them with our cases to enable a richer learning experience.
Track and monitor progress for a specific group of students: Reports for courses you build are tailored to include just the students and just the cases or scripts assigned to that course, making it easy to track and monitor student progress in the course at a glance.
Manage Exam Rosters: Creating your own course (with or without including cases) is a required step for subscribers using Aquifer exams, and allows for quick and easy exam roster creation.
Building a New Course
Tip! Do you want to copy a set of content or users from an existing course to a new course? Save time by using our Duplicate Course feature, which allows you to copy content and/or users to a new course. If not, continue with the directions below to create a new course.
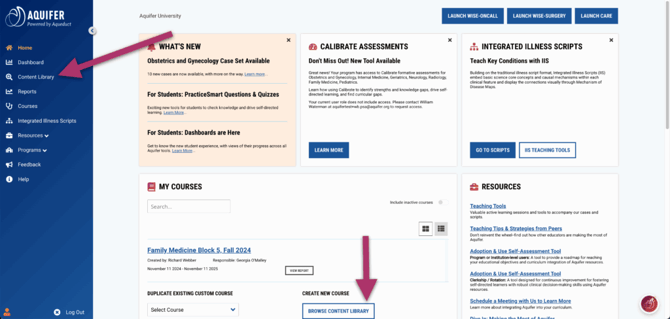
1. From your landing page in Aqueduct, click on the Content Library from the left-hand navigation panel or the My Courses card.
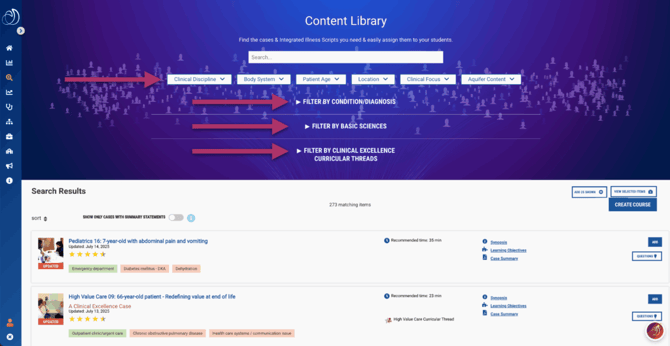
2. Use the Searchable Content Library filters to select the cases and/or Integrated Illness Scripts you would like to add to your course. Note: Skip this step if you want to create the course shell first and add cases later, or create an exam roster.
After you have added your content, you can click View Selected Items to verify that you have selected the cases and scripts that suit your course.
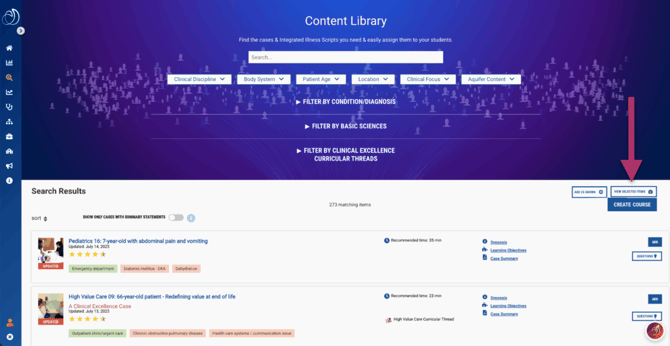
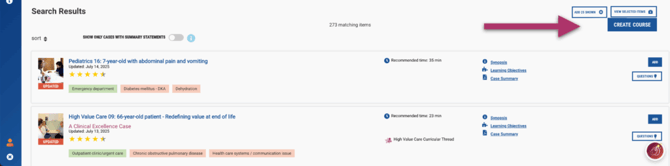
3. Click Create Course.
4. This opens the Course Builder page, where you will complete your course setup.
.png?width=670&height=842&name=Course%20Builder_%20Course%20Summary%20and%20Student-Choice%20Cases%20(1).png)

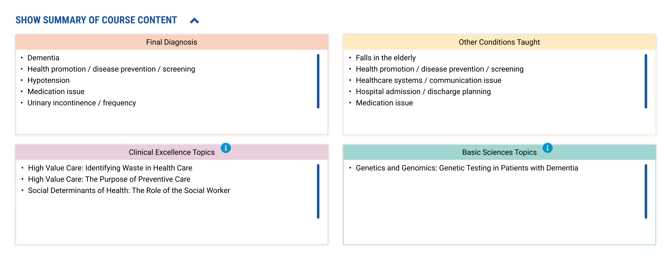
Student-Choice Cases allow students to engage in self-directed learning as part of your course. Students can identify their own learning needs based on their clinical experiences, Aquifer Calibrate assessments, or Aquifer PracticeSmart self-assessment questions.


You can also add other educators or administrators to your course. Users with the Aqueduct role of Course Manager, Lead Course Administrator, Curriculum Administrator, or Program Service Administrator have access to the Course Report for the course.

5. When you have finished adding this information in the Course Builder, click Create Course.
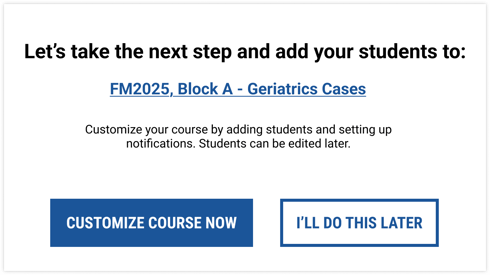
6. You will then see a notification to customize the course by adding students, setting up notifications, or adding Calibrate assessments.
Add Students, Set Notifications, and Add Calibrate
Adding Students
Only the users that are added to your course will be able to view and access it, so it is important that you complete this step. All users assigned to a specific course will receive an automated email invitation. You can add or remove users at any time.
Remember: Users must be rostered in your program before you can assign them to a course.
After clicking Create Course, you will have the option to customize your course by adding students, setting notifications, or setting up a Calibrate assessment.
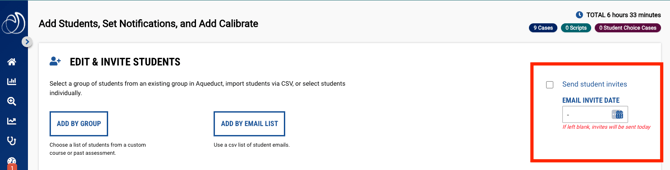
.png?width=670&height=534&name=Course%20Builder_Add%20%26%20Invite%20Students%20(1).png)
You have three options to add users. For any option, select a date to schedule an email inviting users to access this course. If you do not choose a date, the email invitation will be sent immediately.
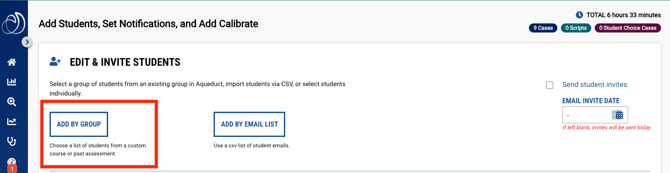
Add by Group will allow you to batch add the students to the course, using groups already created for other courses in Aqueduct or from groups created for Calibrate assessments.
Click Add by Group on the Edit & Invite Students card. Select from previously created groups of students from other courses or Calibrate assessment deliveries.
Option 2: Add by Email
Add by Email will allow you to batch add the students to the course, rather than adding them one by one from a list, and is recommended if you have a large group of students to add to a course.
1. Click Add By Email on the Edit & Invite Students card.
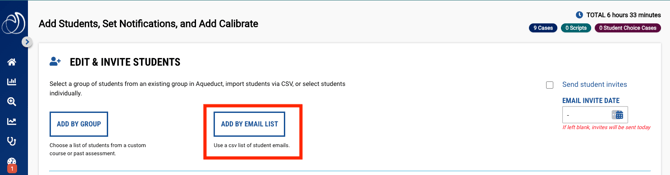
2. Insert comma-separated email addresses into the open field. It is recommended that you have a list of student emails in a column list (in Excel), which you can simply copy and paste into Aqueduct.
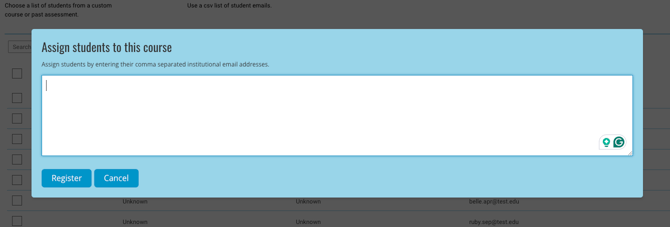
Option 3: Add from Selection Window:
Add from Selection Window allows you to select users to add to your course by selecting them from the list of current users in the system. This option is recommended if you are adding individuals or small groups of students to a course.
1. Select individual students by clicking the checkbox next to their name in the selection window. Students who have not yet completed their registration process will display as Unknown, Unknown in the table, along with their email address.
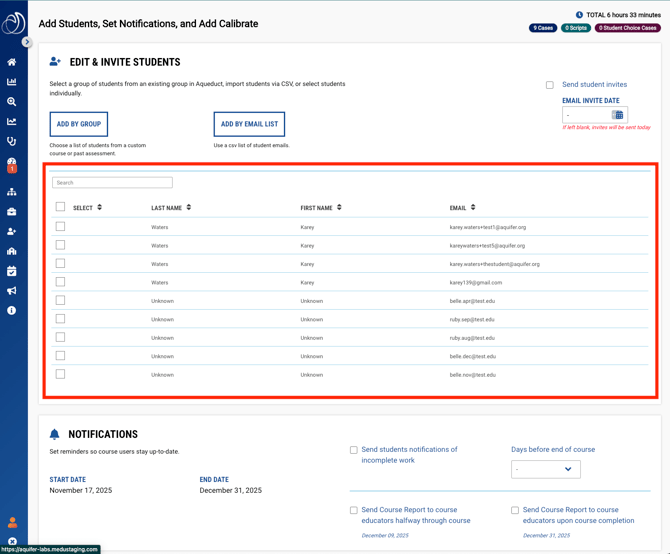
2. As students are added to the course, their name or email address will display to the right of the table. From that list, students can quickly be deleted and will not be added to the course.
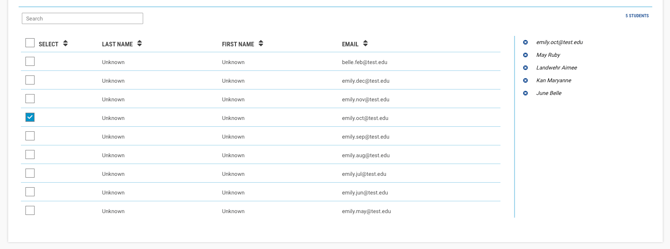
Please note that if “Unknown Unknown” appears to the left of the student email address, they have not yet completed registration or signed in. They will not be able to access the course until they complete their registration.
If you receive a message saying If you receive a message saying “User(s) with the email address(es) (email1@sample.edu...) is not a member of the program yet, but will be added to the course when added to this program,” It means the system does not recognize those emails as having been previously rostered. Check to see that you entered the email addresses correctly. If so, contact your Program Service Administrator to ask to have the users rostered in Aqueduct. Once they have been rostered in Aqueduct, they will automatically be added to the course.

Click on the Edit icon from the Course Page at any time to see course users.

Setting Course Notifications
On the same page, you can automate notifications for course users.
SET UP NOTIFICATIONS FOR STUDENTS
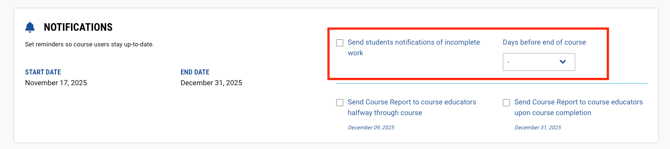
You can set up an automated email notification for students who have incomplete work up to 20 days before the end of the course.
On the Notifications card, check the box by “Send students notifications of incomplete work” and select the number of days before the end of the course for the emails to be sent.
SET UP NOTIFICATIONS FOR COURSE EDUCATORS OR ADMINISTRATORS
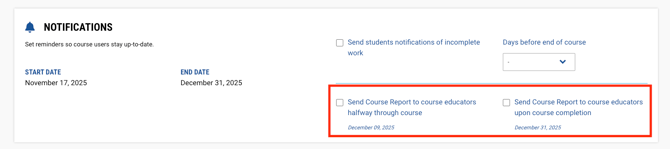
You can also set up automated emails to send a Course Report to educators or administrators who have been added to the course with the Aqueduct roles of Course Manager, Lead Course Administrator, Curriculum Administrator, or Program Service Administrator.
On the Notifications card, check one or both of the boxes by “Send Course Reports to course educators halfway through the course” or “Send Course Reports to course educators upon course completion.” The dates underneath either option display the date the emails will be sent.
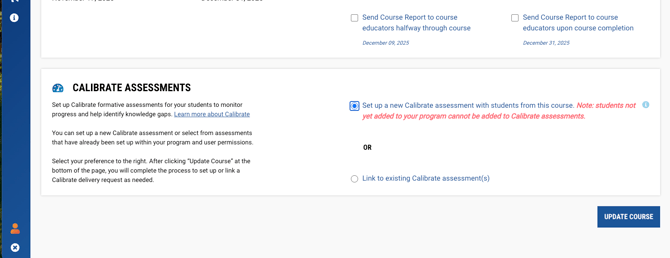
Setting Up Calibrate Assessments
Educator users with the role of Lead Course Administrator and above have the option to create new Calibrate assessments or link to existing Calibrate assessments at the time of course creation.
CREATE A NEW CALIBRATE ASSESSMENT
Clicking the radio button next to “Set up a new Calibrate assessment…” will direct you to the Build a Calibrate Assessment screen after clicking “Update Course.”